How to Ice an Injury

If you are not sure how to ice an injury then here's why you should or should not ice and how to do it safely.
Why ice an injury?
Just as important as knowing how to ice an injury, is knowing why you are icing it in the first place.
The main reason to ice an injury is to help reduce pain by reducing the swelling and inflammation of an ACUTE soft tissue injury. Acute, means an injury which happened less than 48 hours ago. Typical acute injuries that runners might have could be an ankle sprain or a twisted knee.
When you twist your ankle (for example), the body reacts by sending more blood to the damaged tissues try to combat the trauma. This extra blood in the tissues causes the inflammation and swelling and resulting pain.
Not all inflammation is bad though. The increased blood flow to the area brings cells, proteins and chemicals which are all part of the healing process. So the main reason for icing is not to get rid of all the swelling but to reduce it during the initial phase so that there is less pain and more function in the injured area.
When to ice an injury
Icing should be done within the first 48 hours of the injury. There is no value doing it after that period. Research has shown that if you continue to ice over several days or weeks, the injury in fact takes longer to heal.
Remember, inflammation is you body's way of healing an injury so inflammation is a necessary part of the HEALING process.
How to ice an injury at home
You are not icing to heal the injury but to lessen the swelling and thus the pain. Also icing will numb the area a little so that you are more comfortable.
What to use for ice:
- Place a bag of frozen peas or other small frozen veg on the injury. These are great as they can easily mold around the injured area and can be refrozen. However mark the bag well with a big cross as once the vegetables have defrosted you will not want to eat them. I also find that after several uses, the bag starts to smell a bit - maybe the veg starts to turn....
- Place crushed ice in a zip-lock bag and then apply it to the injury. You could add a wee bit of water too to make the ice more slushy. Just make sure that the zip-lock is well closed.
- In advance, fill small paper cups with water and let them freeze. When you need to ice, take a frozen cup and peel off some of the paper. You can then use the exposed ice to massage the injured area. You can get a bit wet once the ice starts to melt so be prepared.
- Use ice packs filled with a freezing gel/liquid bought specifically for treating an injury. They can be reused indefinitely and come in all shapes and sizes. I have several in my freezer which I use for all sorts of things from headaches, migraines, injuries, insect bites and so on. Tip: Buy an ice pack that has some sort of tie or wrap to stop it falling off.
Method of how to ice an injury:
- Sit somewhere comfortable and raise your injured limb. Raise it and rest it on a surface as high as you comfortably can.
- You may find it more comfortable to place a thin cloth such as a tea towel on your injured area before applying the ice. This will also help prevent frostbite.
- Place the ice on the injured area for 10 minutes maximum then have a break from icing for 10 minutes. Repeat this process at least 3 times then have a break for a couple of hours and repeat. Doing 3 sessions a day for the first 2 days following an injury is enough. Going past that could hinder the body's natural healing process and your injury could then take longer to heal.
(Please note that as an Amazon associate I earn from any qualifying purchases)
You might like these
Common Running Injuries - Which runners are most at risk of injury.
Are you plagued with common running injuries? You are part of the 79% of runners who get injured every year. Are older runners more at risk of injury.
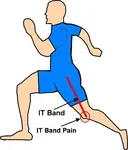
ITB Syndrome and how to cure it fast
Don't let your ITB Syndrome pain get worse. I've suffered with it twice and here's how I healed mine.
Hamstring Tendonitis in Runners
Hamstring tendonitis is a nuisance of an injury but there are home treatments that you can do to get your back running.

Hi and welcome to Midlife Running. Want to know a bit about me and who is behind this website?. About Me
My Personal Blog
Want to know more about my day to day life, running experiences and where I live? Click to my blog Going Paces
Latest Blog Post: How I ran I00km in the South of France
Affiliate Products. Throughout this website I may recommend products that I love and use. If you buy something through one of those links, I receive a small commission. There is no additional cost to you. To learn more, please see my affiliate disclaimer.
Recent Articles
-
Training Plan - Half Marathon
Hi Nicole Robert Here I wanna ask some question about this MAF training but this detail about me 1'm 30 years old, already can walking and little bit -
Fartlek Intervals
How should I run my fartlek intervals? I'm a slow runner in my 50s. I run easy miles slower than my marathon pace. So do I run my fartlek intervals at -
MAF training to BQ and better
I am a 53 year old male and have been running for about 12 years. I ran my first marathon in 2016 and have run 11 so far with a best of 3:29. I have been -
Fear of shin splints
I signed up for a 10K in July because two of my daughters are doing it and it seems fun. I’m 63, and walking is easy! I also play golf and play pickleball -
Skin Cancer in Runners: Risks, Signs, and Prevention Strategies
 Explore the importance of skin safety measures to prevent skin cancer in runners, including sunscreen application, timing runs, and investing in sun-protective gear.